Document Actions
 A Short Guide to Plone
Note: This is the print view with all the Reference Manual pages on one page. The paginated version is available here, if you prefer that.
1. Introducing Plone
1.1. Logging in to the Plone site
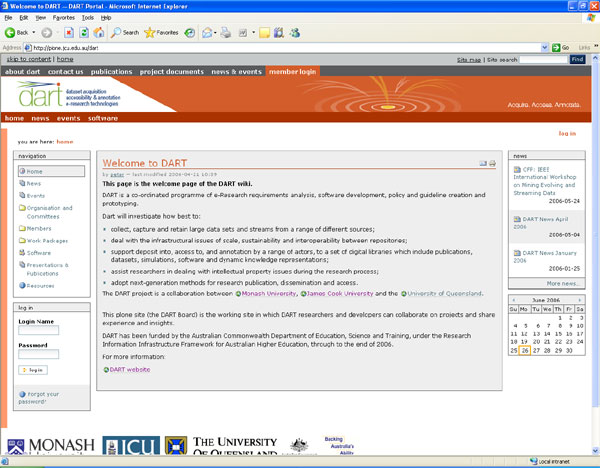
Although you can freely view any public content on the Plone site, to view private content, or to add or edit files and pages you must first login. The Plone site is located at: http://plone.jcu.edu.au. Choose the correct portal for your group by clicking on the appropriate link.
To login to Plone:
- click the login link in the upper right hand corner of the page
- enter the same JC number and password that you use to login to the JCU network
- if you would like Plone to remember your JC number, you check the “Remember my name” checkbox by clicking on it
- click the login button at the bottom of the page to login.
You can also use the login section at the bottom left of the DART portal screen.
To log out of Plone
Click the logout link in the upper right hand side of the page.
1.2. Enabling cookies
To log into the Plone site you must have cookies enabled on your web browser. To enable cookies on your browser, follow the steps listed below for your particular browser.
Internet Explorer 6.x
- Select Tools > Internet Options
- Click the Privacy tab at the top of the screen
- Move the slider to Medium and click OK
Internet Explorer 5.x
- Select Tools > Internet Options
- Click the Security tab at the top of the screen
- Click Custom Level, and scroll down to the Cookies section
- Set Allow Per-Session Cookies to Enable, and click OK
Mozilla 1.x (Firefox)
- Select Tools > Options
- Click the Privacy Icon, and then the Cookies tab
- Check the “Allow sites to set cookies” checkbox
Opera
- Press F12
- Click “Enable Cookies”
Netscape Navigator 6.x
- Select Edit > Preferences
- Click Privacy and Security in the menu on the left
- Select Cookies
- Select “Enable All Cookies” and click OK
Safari
- Click on the Safari-menu in Safari
- Click on the Preferences ... item in the menu - a new window opens
- Click on the Security icon near the top of the window.
- Under Accept Cookies the Always or Only from sites you navigate to must be selected.
- Click Ok to save changes
1.3. A quick tour of Plone
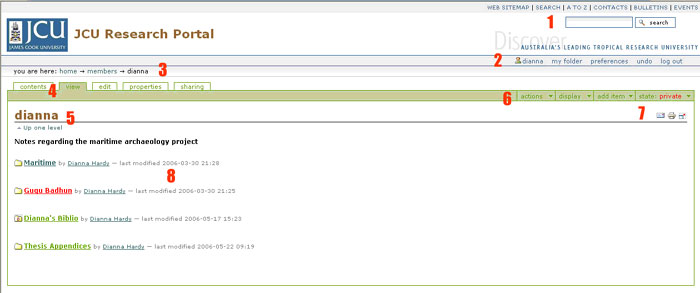
Once you have logged into Plone, click on the my folder link on the Personal bar (2 in the diagram). You should see a display similar to the one below.
-
LiveSearch
-
Personal bar
-
Breadcrumb trail
-
Content management tools
-
Folder name
-
Plone bar
-
Accessibility tools
-
Folder contents
LiveSearch
A dynamic search engine that automatically updates the search results as you type a string in the search box.
Personal Bar
Contains links for logging in an out, access to your folder and your personal preferences for display of the site.
Breadcrumb trail
Displays your current location in the site hierarchy.
Content management tools
Tools for editing and viewing documents to which you have access.
Folder name
Lists the name of the folder you are currently viewing.
Plone bar
Contains the menus for adding an item and setting the state of an item.
Accessibility tools
![]()
Email – export this file as an email attachment
Print – print this file
Favorites – add this page to your favorites
Full screen – Toggle between full screen and normal Plone view
Folder contents
A display of any items in the folder.
1.4. Folder display options
Display View
Plone allows you to pick several ways to display the contents of a folder. The standard view is listed below. To change the view, click the display menu item from the Plone bar and choose the appropriate view from the list.
Folder view | Description |
Standard | Lists all content items in the folder and give Title, Description, Creator and Date details |
Summary | Lists Title and Description of the content |
Tabular | Lists the content items in a table format |
Thumbnail | Lists the images in thumbnail form |
Content item as default | Lets you set a particular item as the home page for this folder |
1.5. Setting up your folder preferences
Setting up your folder and preferences
Each person with an account on Plone has their own folder. Your content will be stored there, and you can create other sub-folders to organize your data.
![]()
Plone personal bar
- To access your folder, click the my folder link on the personal toolbar.
- To edit your preferences, click the preferences link on the personal bar
- If you click Personal Preferences you will be taken to a page where you can set individual values for your folder. These are stored on the Plone server, and will be available regardless of the machine that you use to login.
- For example, at the bottom of the page you can choose the photo to appear on your profile page. Just click the browse button, and select the correct image file.
- Click the Save button at the bottom of the page to save your changes.
You can set your preferences for all of the items listed below:
Metadata | Description |
Full Name | This is automatically filled in by Plone based on your login |
Same as above | |
Location | Not required, but is useful information |
Language | By default Plone is language neutral |
Biography | A short description of who you are |
Home page | The url for an external home page |
Content editor | The default is the Plone content editor |
Enable external editing | Allow editing of pages with external web editor, you must check with the Plone Admin to see if this is enabled |
Listed in searches | Defaults to checked so that your name will appear in member searches of Plone |
Portrait | Allows you to upload a picture of yourself, ideally the photo should be 75 x 100 pixels (between 5-7 cm), the system will resize the image to make it fit |
Delete portrait | Allows you to delete the photo used in Portrait |
1.6. Change the home page for a folder
By default Plone displays a list of the contents of your folder and a brief description. In order to change this view, you will need to create a new page and set the folder to use this page as the default view for the folder.
1. After logging in to Plone, click the My Folder link on the Personal Bar
2. Click on the Display menu and pick "Select a content item as default view"
3. Select the item that you would like to be displayed as the default page of the folder and click the save button
4. In order for the page to be visible you must choose "Make internally visible" from the state menu on the Plone bar
2. Adding and editing content
2.1. What kind of content can I post?
What kind of content can I post?
As a member of a Plone site, you have been automatically been granted access to add/edit/delete content from your personal folder. Based on the security needs of your group, you may also granted access to other folders in your portal.
The following table lists the basic types of documents that Plone can store. There may be others based on your group’s needs.
Content Type | Description |
Document | The most common type of content added to Plone. It closely resembles a web page. |
News Item | A piece of content that appears under the news tab. For example this could be a press release. |
Link | A hypertext link to another item in Plone or to an external item. |
Image | This content type usually ends with an extension such is: gif, jpg, png, tif or pict. |
Event | An upcoming event, meeting, conference, etc. Appears under the events tab. |
Folder | Similar to a folder on a hard drive, it can contain content. |
Topic | A grouping of other content. Similar to a saved search, in that content of a certain type is grouped together. Topics can only be added by an admin. |
File | A piece of content, can be many different formats. |
Page | Contains text content that is to be formatted by Plone, includes HTML |
Smart Folder | A folder that contains links to the results of a search |
2.2. A closer look at the my folder area
Anytime you click on the my folder link on your personal bar, you will be taken to your personal folder area. Below is a description of the items you may find there. By default the content will appear under the view tab in the Plone bar.
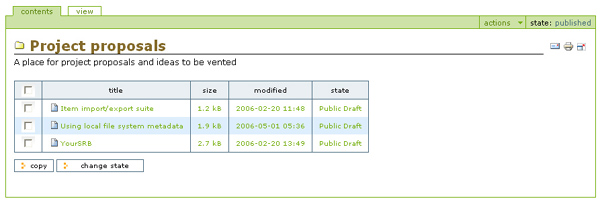
Contents tab
- A listing of the content arranged within a table showing title, size, modified, state and order
- By clicking on the up or down icon, an item can be moved up or down in the list
- Buttons along the bottom of the table allow items to be copied, cut, renamed or deleted
- The Change State button allows the document metadata to be updated. See "setting the document metadata" section for more info.
View tab
- Shows a listing of the content arranged by Title
Edit tab
- Allows the user to edit the items Title and Description for this item
Properties tab
- Allows the user to set/edit the metadata for this item. This is discussed further in the “setting the document metadata” section.
Sharing
- Allows the user to add users who can view this item. This is discussed further in the “Sharing your document” section.
2.3. Adding a document to Plone
There are two ways to add information to Plone:
- Add a pre-existing document or file such as Word or a PowerPoint presentation
- Create a new document using the Plone interface
2.4. Adding a pre-existing file
The instruction below describle the steps to add a pre-existing file to the Plone site. The steps are similar for other types of content such as images.
- Make sure that you are logged into Plone
- Click the my folder link on your personal bar (just under the banner)
- You should now see the contents of your folder with several tabs running across the top. These tabs as well as the links to the right make up the Plone bar.
- Select file from the add item menu on the Plone bar.
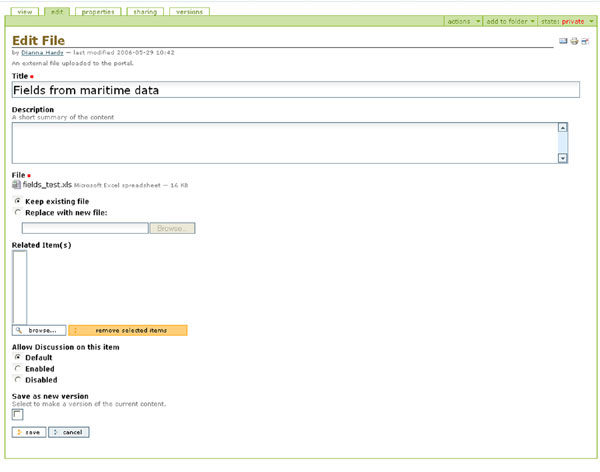
- Fill in the form. Only the fields with a red box are required.
- Use the browse button to select the file from your computer or another location.
- Click the save button to finish.
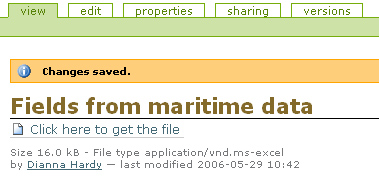
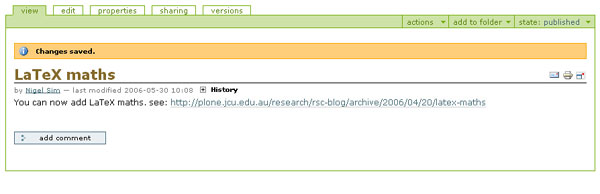
You should now see a message saying that your changes have been saved. There will be a link labeled: Click here to get the file. If you click on this link you will be able to download the file to your computer. Extra details regarding the files type, size and data modified are also listed.
2.5. Creating a new document
Follow the steps listed below in order to create a new document (page) in Plone.
- Make sure that you are logged into Plone
- Click the my folder link on your personal bar. You should now see the contents of your folder with several tabs running across the top.
These tabs as well as the links to the right make up the Plone bar. - Click the Add New Item menu, and you will see a list of document types that you can choose.
- Choose the appropriate type of file from the drop-down menu. Fill in the form. Only the fields with a red box are required. See setting document metadata for more information on how to fill in the fields.
2.6. Setting the document metadata
Each item in Plone has specific properties called "metadata" that are associated with it. This metadata allows documents to be found easily via searches and other queries to the system. Although the metadata requested will vary from one content type to another, in general you will find the following values for an item.
Metadata | Description |
Title | The title of the item |
Description | A short, one paragraph description of the item |
File | The source file for the item |
Body text | You can cut and paste this in from other documents, or type it in using the Plone editor. |
Related items | Links to files already on the Plone system. |
Allow discussion | The default is to enable discussion, this can be turned off |
Save as new version | Select to make a version of the current content. |
Version comment | Enter a comment below to describe the changes you've made. |
2.7. Setting advanced metadata properties
In order to aid the advanced searching capabilities of Plone, you can add additional metadata to describe your item. To add this metadata, click the properties tab of any document. The metadata items are described below.
Metadata | Description |
Exclude from navigation | Item does not appear in the navigation tree |
Keywords | Identifies the item by keywords used in search |
Contributors | Info about the people who contributed the item |
Creators | An item can have multiple creators, primary added first |
Effective Date | Can be used to delay making the content available |
Expiration Date | After this date the content is no longer available |
Language | By default, Plone is language neutral |
Copyrights | Displays copyright info for this item |
3. Managing your content
3.1. What is a workflow and why do I need one?
Workflows and document publishing
A workflow is a
process that your document passes through before it becomes available to others
via Plone. This process ensures that content posted on Plone meets standards for access control, security and intellectual property requirements.
When an item is first created, its state is visible. If the document
must be reviewed by a second-party before it is published, then that person(s)
is part of the workflow. At each point
in the workflow your document will have a different state. These states are listed below.
|
State |
Description |
|
Visible |
|
|
Pending |
|
|
Published |
|
|
Private |
|
3.2. How does content get reviewed in a workflow?
 The review list will appear on the right when you log in as a user who has review authorization and there are items to review. The review list is a list of items that have been submitted by for review.
Click the document link to open the item. At this point you have the following choices for this item:
Reject the item:
Reject the item by selecting reject from the drop-down choices
You would reject the item if you feel that it is not appropriate for the site, or if it requires more work
This returns the item to the visible state
Usually you will want to click the advanced option to open the comment form and add some comments describing why the document was rejected
Approve the item:
Approve the item by selecting Publish.
This changes the content into the published state
The content is now publicly available
Edit the item:
As the reviewer you have permission to edit the document yourself. So make any changes that are necessary, and then approve the item.
Do nothing:
If you’re not sure whether this item is suitable or not, you can just leave it
This will put the document in limbo for the time being, and it will eventually need to be either approved, edited or rejected.
3.3. How to edit a published document
In order to make an edit to a previously published document, there are two choices:
Author
- The author can chose retract from the workflow drop-down item, which moves the document back into the visible state.
- The author then makes the change and saves the document which adds it back to the review list.
- It must be approved by the review/manager and then it is published again
Manager
- Any manager can edit any document
- So he/she edits the document, and it is republished without needed to go through the workflow process.
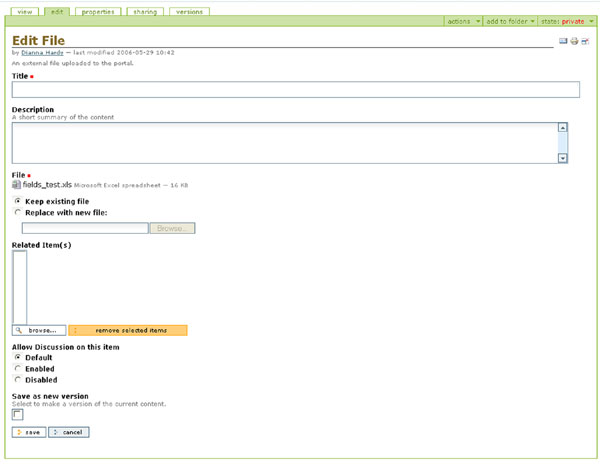
3.4. Editing metadata for files
Individual file and document metadata may be edited by selecting items from the Contents tab of your folder.
Click on the Title of the item, and then the Edit tab on the Plone bar.
Make any changes needed to the metadata fields and click the Save button to finish.
3.5. Adding an updated version of a file
In order to upload a newer version of a file, you will need to edit that item. Choose the item from the contents view tab in your folder, and then click the edit tab on the Plone bar.
Only the fields with a red box are required.
To update your file, click the Replace with new file radio button, and click the Browse button to select the new version of the file.
If you would like to save this as an alternate version of the file, click the Save as new version check box. If this choice is made a comments box will appear, allowing you to add version information.
3.6. Sharing a document
Currently the only way to share a document in Plone is to grant ownership of your document to the other person(s). To do this:
- Set the state of the document
to Private
- Click the sharing tab on the
Plone bar
- The sharing page has 4 sections:
- Current sharing permissions
- Add sharing permissions to users
- Add sharing permissions to groups
- Change ownership of this page
- Scroll down to the section "Add
sharing permissions to users"
In this section you specify the user to whom you would like to grant ownership of the page.
Enter their user name in the Search Term field and click the "perform search" button. - You should now see the screen below.
Select Owner from the Role to assign drop-down list and click the "assign local role to related user(s)" button.
4. Using other types of content
4.1. Adding images
Images may be added by selecting image from the add item menu on the Plone bar.
If the image is of type .gif, .jpg, .png, or .pict, it should be viewable in the web browser and the image will not need to be downloaded separately. The metadata for an image is very much the same as any other type of document.
4.2. Adding and editing events
Adding and editing events
In order to add an event to the calendar, select event from the Plone bar drop-down list.
The following metadata items are required. Although not required, Location is a useful bit of information to include.
Metadata item | Description |
Title | A short description of the event |
Event starts | Date/time in the format |
Event ends | Date/time in the format |
Event types | The type of event, meeting. There can be more than 1 type chosen. |
4.3. Adding and editing news items
News items are created in the same way as other documents, but will appear under the News tab once the item is published.
To create a News item, click news item from the add item menu on the Plone bar.
Enter the metadata and click the Save button. Note: only Title and Body text are required.
Metadata item | Description |
Title | A short descriptive title |
Description | A paragraph long description of the document |
Body text | The main text for the document. |
Image | Click the browse button to choose the image |
Image caption | The text that will appear under the image |
Related items | Any other documents on Plone that are of interest |
Allow discussion | Comments can be added to this document |
Save as new version | Save a new version of this file |
4.4. Adding links
Links can also be added into Plone. To add a link, choose link from the add item menu on the Plone bar.
Add the metadata. Only Title and URL are required. To finish, click the save button.
| Metadata | Description |
|---|---|
| Title | A short description of the link |
| Description | A longer description of the links. Can be a few sentences in length |
| URL | The complete url for the link |
| Related items | Links to other items on Plone that may be relevant |
4.5. Adding a link to my favorites
Plone has it's own internal method of letting users create a list of bookmarks or favorites in their personal folder. If you have any, the my favorites box will appear along the right side of the page with a list of your favorites.
To add any page to your favorites folder, look for this ![]()
 and click on it. This will
automatically bookmark the page you are viewing in your favorites folder.
and click on it. This will
automatically bookmark the page you are viewing in your favorites folder.
4.6. Adding a weblog
A ‘weblog’ or ‘blog’ is a kind of online journal. Rather than creating many short individual files, a weblog can contain them all in one file. Images, links, text and many other types of content can be stored in your weblog.
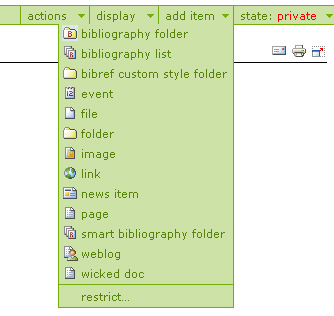
To create a weblog, click on the add item menu on the Plone bar and choose weblog.
Enter a title for
your weblog and a brief description of what it is about. This text will be displayed at the top of the
page before any weblog entries.
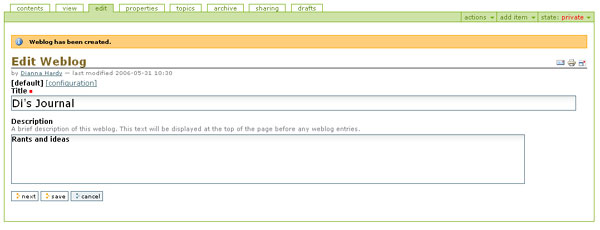
Click the save button to create your weblog. By default your weblog is created with one topic called General. Topics can be used to organize your content into different categories. Otherwise your entries will be listed under General. You must have at least one topic in your weblog in order for it to work.
To create an entry in your weblog, click on the link for your weblog, and choose weblog entry from the add item menu on the Plone bar.

Fill in the metadata information for this weblog entry.
|
Metadata field |
Description |
|
Title |
A brief title for this entry |
|
Excerpt |
If your entry is long, you might want a short description here. |
|
Entry text |
The content of your entry, can include images and links |
|
Categories |
If you have more than 1 topic defined for the weblog it will appear here. |
|
Trackback |
If you want to send a trackback ping to another blog, enter the trackback url here |
Info about
Trackbacks
Trackbacks allow sites to communicate with each other about related
resources. For example, if blogger1
wants to notify blogger2 that he’s written something noteworthy, he would send
a trackback ping to blogger2.
4.7. Using an external editor to update a weblog
You can update your blog using an external weblog client
such a Performancing for Firefox. The Performancing addon to Firefox allows you to bring up a text window within your Firefox browser, add the content and
publish it quickly. The following instructions show how to install
Performancing, and use it to update a Plone blog.
- The Performancing addon only works for Firefox. If you don't have Firefox, you can download it at: http://www.mozilla.com/
- Download the Performancing addon at: http://performancing.com/firefox/
- You will need to restart Firefox for the addon to become available. Close Firefox and open it again.
- Click F8 to start Performancing application. Or, if you prefer you can click the pencil and paper icon at the bottom right of the browser window.
- You should see the screen listed below.
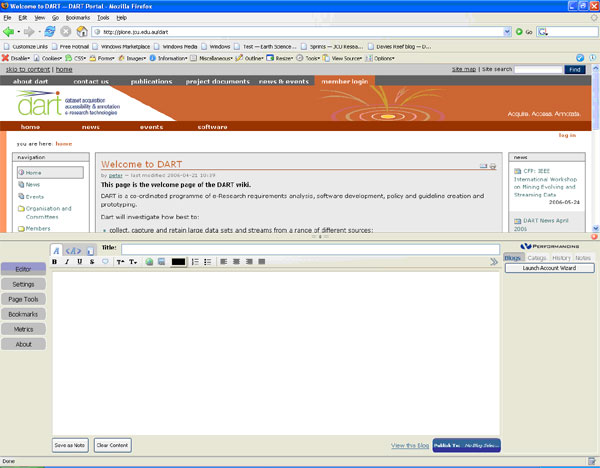
- Click the Launch Account Wizard button to setup Performancing to link to your DART blog.
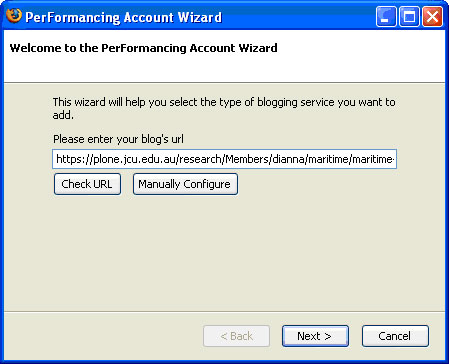
- Enter the url to your blog.
- The easiest way to get this is go to your blog and copy and paste the url from your browser window.
- After you have pasted in the url, click the Manually Configure button.
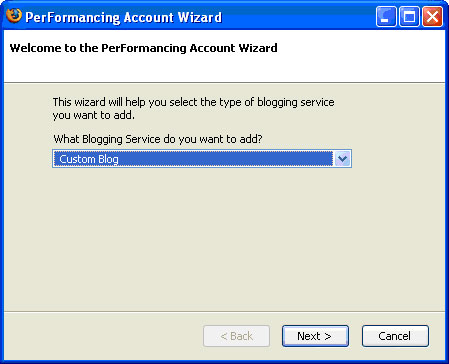
- Choose Custom Blog from the drop-down box, and click the Next button.
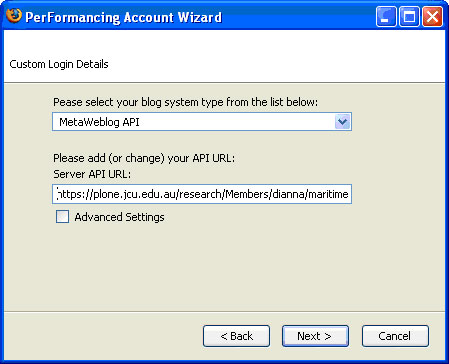
- Choose MetaWeblog API from the top drop-down box, and paste the url for your blog into text box.
- Click the Next button.
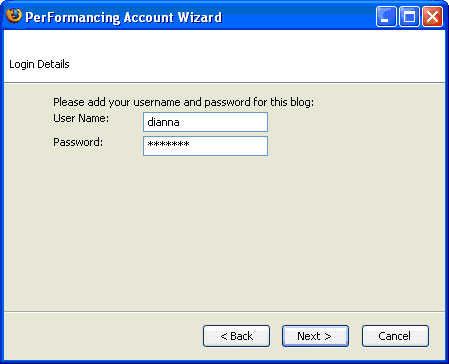
- Enter your Plone User Name and Password, and click the Next button.
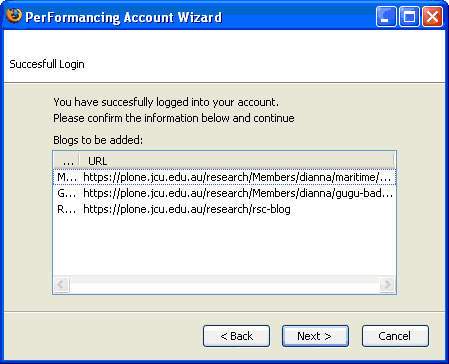
- Once you have logged in successfully you should see the dialog box above.
- Click the Next button.
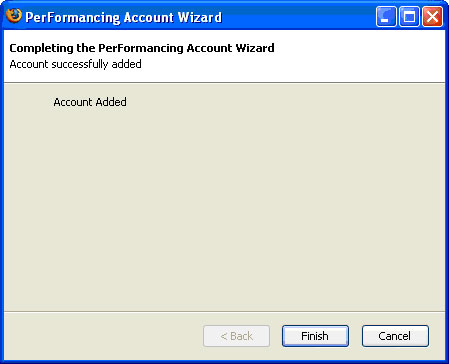
- Click the Finish button to complete setting up your account.
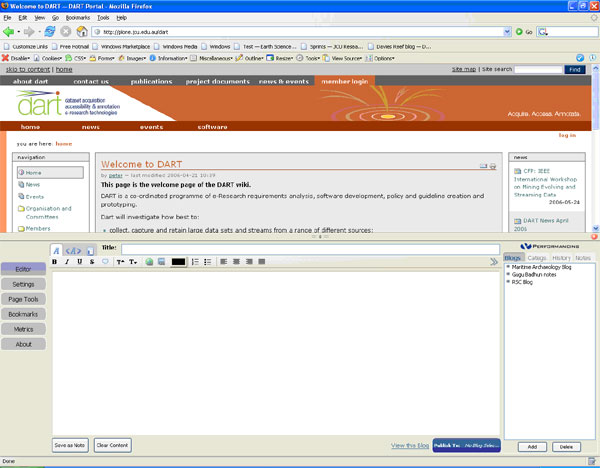
- You should now see a pane on the bottom right of the window
showing your blogs.
- Select the appropriate blog in the blog pane by clicking on
it.
- Enter a title and tab to enter the text in the text area.
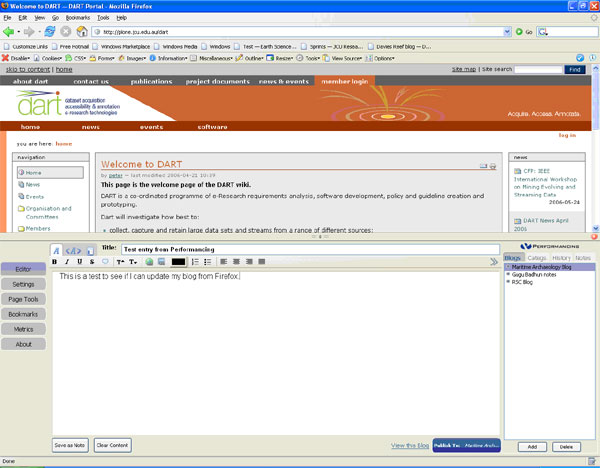
- If you have more than one topic defined for this blog, you can click the Categs Tab on the blog pane and choose a topic by clicking in the appropriate checkbox
- To publish this entry to your blog, click the large blue button at the bottom which says Publish To: <your blog name>
- If you would like to view this entry in your blog, click the View this Blog link that is just to the left of the large blue publish button.
4.8. Organize your content using folders
You can create folders within your folder in order to store your content in a logical fashion, making it easy for others to find your files.
To add a new folder, navigate to the place where you want the folder to be created and choose folder from the add item drop-down list on the Plone bar.
The metadata for
folders is very simple. Just add a Title and a Description for the folder. You can choose to make this folder public if
you would like to share the data within it. Any new items created within the folder will have the same state by default as the folder. These states can be changed later.
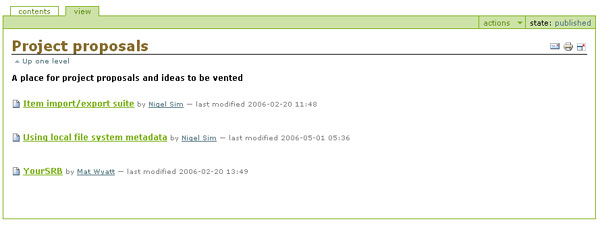
When you click on
a folder, you will be taken to the default page for folder. When you click on a folder link, Plone looks
for a file within that folder named index_html to use as the default page. If there is no default page, the folder
displays the contents of the folder as a list of links.
To create a default page for the “home page” of the folder, you can create a document and save it with the name “index_html. The folder will always look for this page before displaying the contents of the folder.
Owners and managers of a file have permission to edit the documents within the folder. To see the contents of a folder, click the Contents tab.

In order for other people to view the contents of your folder, you will need to publish the folder. There is no workflow associated with folders, so folders only have three states: private, visible and published. To publish a folder just choose publish from the state drop-down menu on the Plone bar.
5. Collaboration using Plone
5.1. Adding comments to content
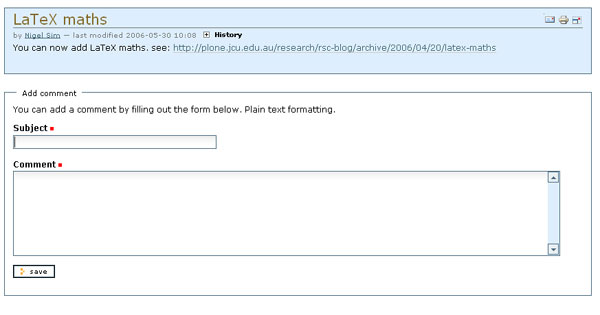
With the exception of folders, almost all content in Plone can be enabled to allow comments. If comments are enabled for a particular document you will see an add comment button underneath the content.
Click the add comment button, and when the form opens, enter a subject and text for the comment. To save the comment, click the save button at the bottom of the form.
5.2. Searching for Content
Plone contains a search engine called LiveSearch which can quickly execute a full text search of all documents. Enter a text string in the search box, and Plone will search for all content which includes that string in either the metadata or the text of the document.
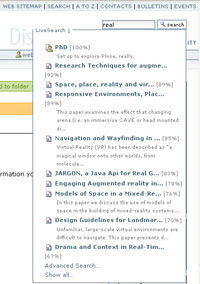
LiveSearch dynamically changes the results of your search as your type in the search box. The results of the search can be modified by using the techniques below.
| Option | Description |
| Globbing | Use an asterisk
to signify any letters Must not be the first letter of the word Example: rea* = really, reality |
| Single Wildcards | Use a ? to
signify a single letter
Must not be the
first letter of the word Example: ta?k = task |
| And | Use and to
search for two terms Must find both words to return results Example: biology and whale |
| Or | Use or to search for either term Example: ship or boat |
| And Not | Where one term
is present but not another Example: fish and not trout |
5.3. Viewing content via RSS feeds
Viewing RSS News Feeds
Rather than
having to check each individual blog or folder that may have content that you are interested
in, you can view the RSS version of that file using an RSS reader. RSS stands for Really Simple Syndication, and
allows pages to be viewed external to Plone or any other web publishing
service.
Many web browsers have an RSS reader already installed, or offer plug-ins that have this functionality. The list below shows some of the most common RSS readers.
|
Product |
Description |
Download site |
|
Sage |
free addon for Firefox |
|
|
Safari |
web browser for Mac |
no download needed |
|
Liferea |
free RSS reader for Linux |
The following instructions show how to download and install Sage for Mozilla (Firefox).
- Go to http://sage.mozdev.org/install/ using Firefox and choose the "click here to install" link
- Accept the download by clicking OK
- Close and restart Firefox
- Click Tools | Sage from the menu bar to start Sage
You should
see the screen below:
- Under Options pick Manage Feed list
- Click the New Bookmark icon at the top left
- In the dialog box enter a name and location for the blog.
In order to get Plone blogs, you will need to append "feed.rdf" to the end of the url
Example:
Name: Nigel's blog
Location: http://plone.jcu.edu.au/research/Members/nigel/nigels-blog/feed.rdf
Click the check box to load this Bookmark in the sidebar
If you want to be able to access a prive Plone blog via the RSS feed, using software other than an integrated Firefox or Safari reader, then you need to slightly alter the RSS URL to tell Plone to accept HTTP auth. To do this, append the following to the RSS feed:
?disable_cookie_login__=1
So, if the blog was private, it's RSS feed would be:
https://plone.jcu.edu.au/research/Members/nigel/nigels-blog/feed.rdf?disable_cookie_login_