 Adding and editing content
Note: This is the print view with all the Reference Manual pages on one page. The paginated version is available here, if you prefer that.
1. What kind of content can I post?
What kind of content can I post?
As a member of a Plone site, you have been automatically been granted access to add/edit/delete content from your personal folder. Based on the security needs of your group, you may also granted access to other folders in your portal.
The following table lists the basic types of documents that Plone can store. There may be others based on your group’s needs.
Content Type | Description |
Document | The most common type of content added to Plone. It closely resembles a web page. |
News Item | A piece of content that appears under the news tab. For example this could be a press release. |
Link | A hypertext link to another item in Plone or to an external item. |
Image | This content type usually ends with an extension such is: gif, jpg, png, tif or pict. |
Event | An upcoming event, meeting, conference, etc. Appears under the events tab. |
Folder | Similar to a folder on a hard drive, it can contain content. |
Topic | A grouping of other content. Similar to a saved search, in that content of a certain type is grouped together. Topics can only be added by an admin. |
File | A piece of content, can be many different formats. |
Page | Contains text content that is to be formatted by Plone, includes HTML |
Smart Folder | A folder that contains links to the results of a search |
2. A closer look at the my folder area
Anytime you click on the my folder link on your personal bar, you will be taken to your personal folder area. Below is a description of the items you may find there. By default the content will appear under the view tab in the Plone bar.
Contents tab
- A listing of the content arranged within a table showing title, size, modified, state and order
- By clicking on the up or down icon, an item can be moved up or down in the list
- Buttons along the bottom of the table allow items to be copied, cut, renamed or deleted
- The Change State button allows the document metadata to be updated. See "setting the document metadata" section for more info.
View tab
- Shows a listing of the content arranged by Title
Edit tab
- Allows the user to edit the items Title and Description for this item
Properties tab
- Allows the user to set/edit the metadata for this item. This is discussed further in the “setting the document metadata” section.
Sharing
- Allows the user to add users who can view this item. This is discussed further in the “Sharing your document” section.
3. Adding a document to Plone
There are two ways to add information to Plone:
- Add a pre-existing document or file such as Word or a PowerPoint presentation
- Create a new document using the Plone interface
4. Adding a pre-existing file
The instruction below describle the steps to add a pre-existing file to the Plone site. The steps are similar for other types of content such as images.
- Make sure that you are logged into Plone
- Click the my folder link on your personal bar (just under the banner)
- You should now see the contents of your folder with several tabs running across the top. These tabs as well as the links to the right make up the Plone bar.
- Select file from the add item menu on the Plone bar.
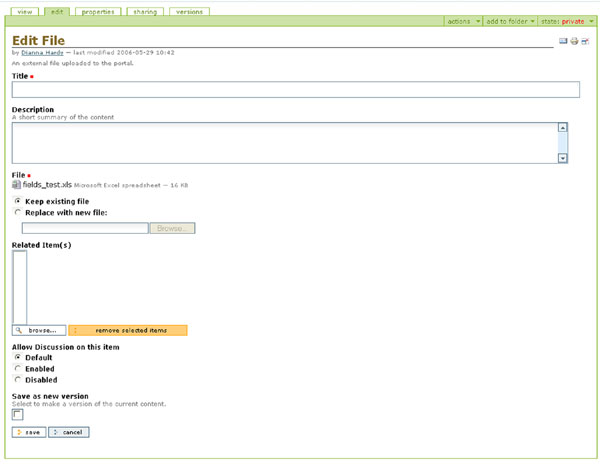
- Fill in the form. Only the fields with a red box are required.
- Use the browse button to select the file from your computer or another location.
- Click the save button to finish.

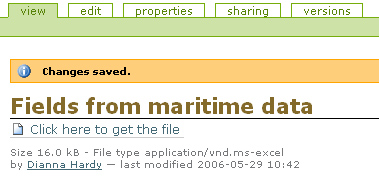
You should now see a message saying that your changes have been saved. There will be a link labeled: Click here to get the file. If you click on this link you will be able to download the file to your computer. Extra details regarding the files type, size and data modified are also listed.

5. Creating a new document
Follow the steps listed below in order to create a new document (page) in Plone.
- Make sure that you are logged into Plone
- Click the my folder link on your personal bar. You should now see the contents of your folder with several tabs running across the top.
These tabs as well as the links to the right make up the Plone bar. - Click the Add New Item menu, and you will see a list of document types that you can choose.
- Choose the appropriate type of file from the drop-down menu. Fill in the form. Only the fields with a red box are required. See setting document metadata for more information on how to fill in the fields.
6. Setting the document metadata
Each item in Plone has specific properties called "metadata" that are associated with it. This metadata allows documents to be found easily via searches and other queries to the system. Although the metadata requested will vary from one content type to another, in general you will find the following values for an item.
Metadata | Description |
Title | The title of the item |
Description | A short, one paragraph description of the item |
File | The source file for the item |
Body text | You can cut and paste this in from other documents, or type it in using the Plone editor. |
Related items | Links to files already on the Plone system. |
Allow discussion | The default is to enable discussion, this can be turned off |
Save as new version | Select to make a version of the current content. |
Version comment | Enter a comment below to describe the changes you've made. |
7. Setting advanced metadata properties
In order to aid the advanced searching capabilities of Plone, you can add additional metadata to describe your item. To add this metadata, click the properties tab of any document. The metadata items are described below.
Metadata | Description |
Exclude from navigation | Item does not appear in the navigation tree |
Keywords | Identifies the item by keywords used in search |
Contributors | Info about the people who contributed the item |
Creators | An item can have multiple creators, primary added first |
Effective Date | Can be used to delay making the content available |
Expiration Date | After this date the content is no longer available |
Language | By default, Plone is language neutral |
Copyrights | Displays copyright info for this item |


