 Using other types of content
Note: This is the print view with all the Reference Manual pages on one page. The paginated version is available here, if you prefer that.
1. Adding images
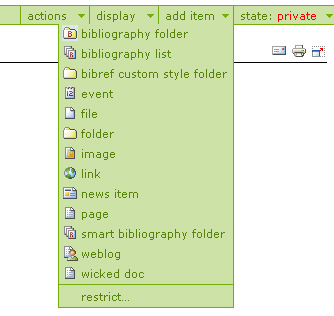
Images may be added by selecting image from the add item menu on the Plone bar.

If the image is of type .gif, .jpg, .png, or .pict, it should be viewable in the web browser and the image will not need to be downloaded separately. The metadata for an image is very much the same as any other type of document.
2. Adding and editing events
Adding and editing events
In order to add an event to the calendar, select event from the Plone bar drop-down list.

The following metadata items are required. Although not required, Location is a useful bit of information to include.
Metadata item | Description |
Title | A short description of the event |
Event starts | Date/time in the format |
Event ends | Date/time in the format |
Event types | The type of event, meeting. There can be more than 1 type chosen. |
3. Adding and editing news items
News items are created in the same way as other documents, but will appear under the News tab once the item is published.
To create a News item, click news item from the add item menu on the Plone bar.

Enter the metadata and click the Save button. Note: only Title and Body text are required.
Metadata item | Description |
Title | A short descriptive title |
Description | A paragraph long description of the document |
Body text | The main text for the document. |
Image | Click the browse button to choose the image |
Image caption | The text that will appear under the image |
Related items | Any other documents on Plone that are of interest |
Allow discussion | Comments can be added to this document |
Save as new version | Save a new version of this file |
4. Adding links
Links can also be added into Plone. To add a link, choose link from the add item menu on the Plone bar.

Add the metadata. Only Title and URL are required. To finish, click the save button.
| Metadata | Description |
|---|---|
| Title | A short description of the link |
| Description | A longer description of the links. Can be a few sentences in length |
| URL | The complete url for the link |
| Related items | Links to other items on Plone that may be relevant |
5. Adding a link to my favorites
Plone has it's own internal method of letting users create a list of bookmarks or favorites in their personal folder. If you have any, the my favorites box will appear along the right side of the page with a list of your favorites.
To add any page to your favorites folder, look for this ![]()
 and click on it. This will
automatically bookmark the page you are viewing in your favorites folder.
6. Adding a weblog
A ‘weblog’ or ‘blog’ is a kind of online journal. Rather than creating many short individual files, a weblog can contain them all in one file. Images, links, text and many other types of content can be stored in your weblog.
To create a weblog, click on the add item menu on the Plone bar and choose weblog.

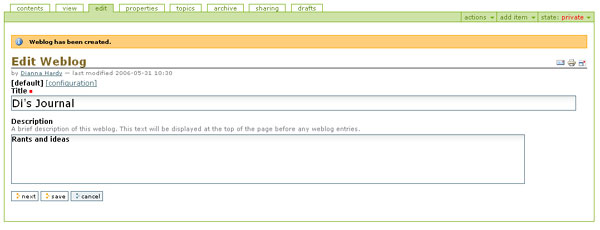
Enter a title for
your weblog and a brief description of what it is about. This text will be displayed at the top of the
page before any weblog entries.

Click the save button to create your weblog. By default your weblog is created with one topic called General. Topics can be used to organize your content into different categories. Otherwise your entries will be listed under General. You must have at least one topic in your weblog in order for it to work.
To create an entry in your weblog, click on the link for your weblog, and choose weblog entry from the add item menu on the Plone bar.

Fill in the metadata information for this weblog entry.
|
Metadata field |
Description |
|
Title |
A brief title for this entry |
|
Excerpt |
If your entry is long, you might want a short description here. |
|
Entry text |
The content of your entry, can include images and links |
|
Categories |
If you have more than 1 topic defined for the weblog it will appear here. |
|
Trackback |
If you want to send a trackback ping to another blog, enter the trackback url here |
Info about
Trackbacks
Trackbacks allow sites to communicate with each other about related
resources. For example, if blogger1
wants to notify blogger2 that he’s written something noteworthy, he would send
a trackback ping to blogger2.
7. Using an external editor to update a weblog
You can update your blog using an external weblog client
such a Performancing for Firefox. The Performancing addon to Firefox allows you to bring up a text window within your Firefox browser, add the content and
publish it quickly. The following instructions show how to install
Performancing, and use it to update a Plone blog.
- The Performancing addon only works for Firefox. If you don't have Firefox, you can download it at: http://www.mozilla.com/
- Download the Performancing addon at: http://performancing.com/firefox/
- You will need to restart Firefox for the addon to become available. Close Firefox and open it again.
- Click F8 to start Performancing application. Or, if you prefer you can click the pencil and paper icon at the bottom right of the browser window.
- You should see the screen listed below.

- Click the Launch Account Wizard button to setup Performancing to link to your DART blog.

- Enter the url to your blog.
- The easiest way to get this is go to your blog and copy and paste the url from your browser window.
- After you have pasted in the url, click the Manually Configure button.

- Choose Custom Blog from the drop-down box, and click the Next button.

- Choose MetaWeblog API from the top drop-down box, and paste the url for your blog into text box.
- Click the Next button.

- Enter your Plone User Name and Password, and click the Next button.

- Once you have logged in successfully you should see the dialog box above.
- Click the Next button.

- Click the Finish button to complete setting up your account.

- You should now see a pane on the bottom right of the window
showing your blogs.
- Select the appropriate blog in the blog pane by clicking on
it.
- Enter a title and tab to enter the text in the text area.
- If you have more than one topic defined for this blog, you can click the Categs Tab on the blog pane and choose a topic by clicking in the appropriate checkbox
- To publish this entry to your blog, click the large blue button at the bottom which says Publish To: <your blog name>
- If you would like to view this entry in your blog, click the View this Blog link that is just to the left of the large blue publish button.

8. Organize your content using folders
You can create folders within your folder in order to store your content in a logical fashion, making it easy for others to find your files.
To add a new folder, navigate to the place where you want the folder to be created and choose folder from the add item drop-down list on the Plone bar.

The metadata for
folders is very simple. Just add a Title and a Description for the folder. You can choose to make this folder public if
you would like to share the data within it. Any new items created within the folder will have the same state by default as the folder. These states can be changed later.
When you click on
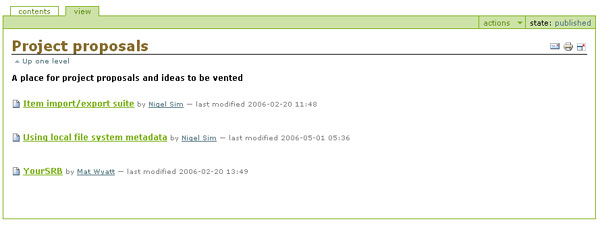
a folder, you will be taken to the default page for folder. When you click on a folder link, Plone looks
for a file within that folder named index_html to use as the default page. If there is no default page, the folder
displays the contents of the folder as a list of links.
To create a default page for the “home page” of the folder, you can create a document and save it with the name “index_html. The folder will always look for this page before displaying the contents of the folder.

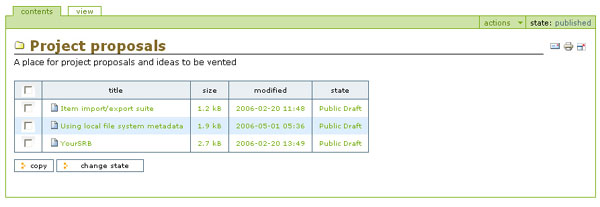
Owners and managers of a file have permission to edit the documents within the folder. To see the contents of a folder, click the Contents tab.

In order for other people to view the contents of your folder, you will need to publish the folder. There is no workflow associated with folders, so folders only have three states: private, visible and published. To publish a folder just choose publish from the state drop-down menu on the Plone bar.


