 Introducing Plone
Note: This is the print view with all the Reference Manual pages on one page. The paginated version is available here, if you prefer that.
1. Logging in to the Plone site
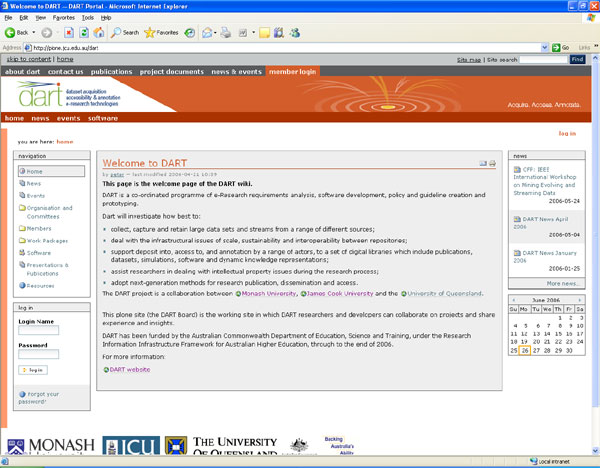
Although you can freely view any public content on the Plone site, to view private content, or to add or edit files and pages you must first login. The Plone site is located at: http://plone.jcu.edu.au. Choose the correct portal for your group by clicking on the appropriate link.
To login to Plone:
- click the login link in the upper right hand corner of the page
- enter the same JC number and password that you use to login to the JCU network
- if you would like Plone to remember your JC number, you check the “Remember my name” checkbox by clicking on it
- click the login button at the bottom of the page to login.

You can also use the login section at the bottom left of the DART portal screen.
To log out of Plone
Click the logout link in the upper right hand side of the page.
2. Enabling cookies
To log into the Plone site you must have cookies enabled on your web browser. To enable cookies on your browser, follow the steps listed below for your particular browser.
Internet Explorer 6.x
- Select Tools > Internet Options
- Click the Privacy tab at the top of the screen
- Move the slider to Medium and click OK
Internet Explorer 5.x
- Select Tools > Internet Options
- Click the Security tab at the top of the screen
- Click Custom Level, and scroll down to the Cookies section
- Set Allow Per-Session Cookies to Enable, and click OK
Mozilla 1.x (Firefox)
- Select Tools > Options
- Click the Privacy Icon, and then the Cookies tab
- Check the “Allow sites to set cookies” checkbox
Opera
- Press F12
- Click “Enable Cookies”
Netscape Navigator 6.x
- Select Edit > Preferences
- Click Privacy and Security in the menu on the left
- Select Cookies
- Select “Enable All Cookies” and click OK
Safari
- Click on the Safari-menu in Safari
- Click on the Preferences ... item in the menu - a new window opens
- Click on the Security icon near the top of the window.
- Under Accept Cookies the Always or Only from sites you navigate to must be selected.
- Click Ok to save changes
3. A quick tour of Plone
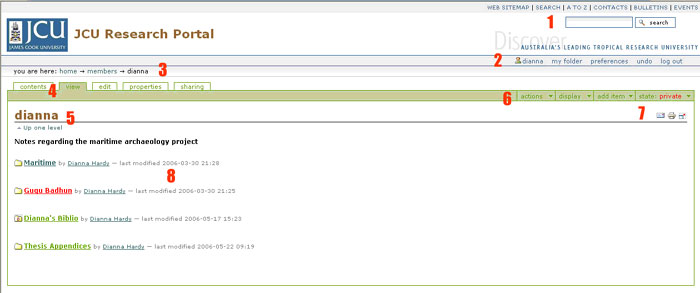
Once you have logged into Plone, click on the my folder link on the Personal bar (2 in the diagram). You should see a display similar to the one below.

-
LiveSearch
-
Personal bar
-
Breadcrumb trail
-
Content management tools
-
Folder name
-
Plone bar
-
Accessibility tools
-
Folder contents
LiveSearch
A dynamic search engine that automatically updates the search results as you type a string in the search box.
Personal Bar
Contains links for logging in an out, access to your folder and your personal preferences for display of the site.
Breadcrumb trail
Displays your current location in the site hierarchy.
Content management tools
Tools for editing and viewing documents to which you have access.
Folder name
Lists the name of the folder you are currently viewing.
Plone bar
Contains the menus for adding an item and setting the state of an item.
Accessibility tools
![]()
Email – export this file as an email attachment
Print – print this file
Favorites – add this page to your favorites
Full screen – Toggle between full screen and normal Plone view
Folder contents
A display of any items in the folder.
4. Folder display options
Display View
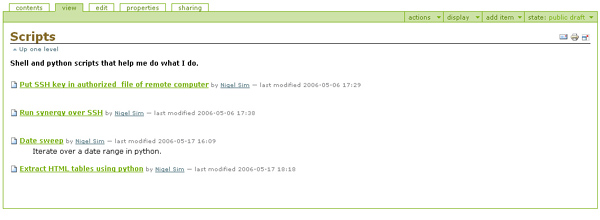
Plone allows you to pick several ways to display the contents of a folder. The standard view is listed below. To change the view, click the display menu item from the Plone bar and choose the appropriate view from the list.

Folder view | Description |
Standard | Lists all content items in the folder and give Title, Description, Creator and Date details |
Summary | Lists Title and Description of the content |
Tabular | Lists the content items in a table format |
Thumbnail | Lists the images in thumbnail form |
Content item as default | Lets you set a particular item as the home page for this folder |
5. Setting up your folder preferences
Setting up your folder and preferences
Each person with an account on Plone has their own folder. Your content will be stored there, and you can create other sub-folders to organize your data.
![]()
Plone personal bar
- To access your folder, click the my folder link on the personal toolbar.
- To edit your preferences, click the preferences link on the personal bar
- If you click Personal Preferences you will be taken to a page where you can set individual values for your folder. These are stored on the Plone server, and will be available regardless of the machine that you use to login.
- For example, at the bottom of the page you can choose the photo to appear on your profile page. Just click the browse button, and select the correct image file.
- Click the Save button at the bottom of the page to save your changes.
You can set your preferences for all of the items listed below:
Metadata | Description |
Full Name | This is automatically filled in by Plone based on your login |
Same as above | |
Location | Not required, but is useful information |
Language | By default Plone is language neutral |
Biography | A short description of who you are |
Home page | The url for an external home page |
Content editor | The default is the Plone content editor |
Enable external editing | Allow editing of pages with external web editor, you must check with the Plone Admin to see if this is enabled |
Listed in searches | Defaults to checked so that your name will appear in member searches of Plone |
Portrait | Allows you to upload a picture of yourself, ideally the photo should be 75 x 100 pixels (between 5-7 cm), the system will resize the image to make it fit |
Delete portrait | Allows you to delete the photo used in Portrait |
6. Change the home page for a folder
By default Plone displays a list of the contents of your folder and a brief description. In order to change this view, you will need to create a new page and set the folder to use this page as the default view for the folder.
1. After logging in to Plone, click the My Folder link on the Personal Bar
2. Click on the Display menu and pick "Select a content item as default view"
3. Select the item that you would like to be displayed as the default page of the folder and click the save button
4. In order for the page to be visible you must choose "Make internally visible" from the state menu on the Plone bar


